0 for 2
Infrared/visible hybrid photograph taken before modifying the camera:

Warning: If you try this and get zapped, it is your own fault! Large capacitors are dangerous!
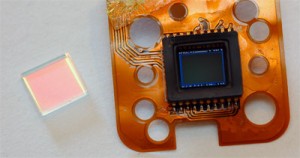
I enjoy infrared photography. I have experimented with film and digital IR photography over the past few years. I usually use a D70 with a good IR filter. This works well, but the exposure times are longer than I’d like. In an attempt to get faster exposures, I tried to modify an old Medion 4.1 megapixel point-and-shoot digital camera as a dedicated infrared camera. This camera already has good IR sensitivity, but I wanted to remove the filter pack to improve sensitivity, lowering exposure times to the handheld range.
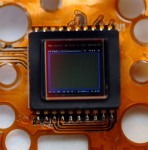
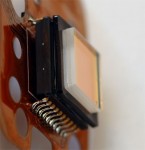
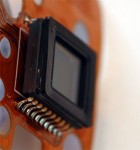
Beyond it’s general poor user interface, this camera shares a major design flaw with most recent consumer electronics: it is designed not to be repaired. It is old enough that it has a mix of screws and snap together parts, so it is slightly easier to open than more recent electronics, which are usually snapped and glued together. It is also old enough that the components are less integrated than newer cameras. This means there is a mess of small circuit boards and fine ribbon cables inside. Eventually, I found the correct boards and cables to remove to get to the sensor. It was soldered to a flexible board that could only be accessed by removing the flimsiest sections of the camera. Once I reached the sensor, popping the filter pack off was easy. Then came the ordeal of making it fit back together without breaking anything.
Once reassembled, I tested it. It worked pretty well. For about ten exposures. Then it started making strange distortions on the pictures. After fiddling with it for a while and getting inconsistent results, I took it apart again look for loose connections.
I think this killed the camera. Like most recent electronics, it wasn’t designed to be repaired, so Taking it apart and getting it working again is a challenge. Doing it more than once is asking for trouble. At some point, I broke the microswitch that senses if the memory card door is open. More importantly, my hand slipped while discharging the flash capacitor, and shorted it to the circuit that zooms the lens.
When working on cameras with a built in flash, it is important to safely discharge the flash capacitor before messing around with other components. On an integrated camera like this one, the way to do that is to pop the case open, put a resistor across the correct pins, and wait. When I first opened the camera, the voltage was over 250. Using pliers with a rubber grip, I put a fairly large resistor across the pins until the voltage dropped under 120, then switched to a smaller resistor, and so on. I carefully checked the voltage several times until the capacitor was safely discharged. Doing this wrong is an easy way to fry a camera, not doing it is an easy way to fry your hand.
After frying the motor control, I have been unable to get the camera working again. This is the same problem I had the last time I worked on a compact digital camera. On the other camera, one of the gears in the zoom mechanism fell off of its axel shortly after the warranty expired. I was able to fix the lens assembly, but the circuit was fried in the process of opening the camera. This project puts me 0 for 2 in attempts to fix push-here-dummy digital cameras. I’ve had better luck with CD players and iPods. The electronic and mechanical parts jammed into modern electronics is impressive, it’s a shame they are built to be disposable.
Before modification:
After modification:
